Anatomy Of An Equine Massage: Part One

The ride you completed yesterday was just a bit harder on you than expected. Your body cringes as your feet hit the floor reminding you of all those miles. A massage right now sounds great, but what about your horse? Maybe his fatigued and sore muscles could use a helping hand too.
When your muscles are tight and sensitive you try to avoid repeating the strain by limiting use in the area and taking it easy. Unfortunately, many of our horses do not complain loud enough and they will do the same work day after day. When you end up with a problem, if you think back hard enough you will remember when his performance slowly declined or his behavior changed.
Muscle injuries can sneak up on your horse little by little until you have an actual problem. You can help head this issues off early by using simple massage techniques. Massage and stretching can also improve the functional length of a muscle. This is a fantastic benefit for the performance horse! By improving the range of motion and his way of going you can actually increase the stride length. Over the distance of a race, the longer steps make him more efficient using less energy and that can help him last longer. Just imagine the benefits of the riding discipline where bigger movement counts.
In each of these features we will show you one or two simple massage moves which you can try at home on your own horse. You'll find that each move can be employed on quite of few areas of your horse. However, before we begin there are a few simple guidelines to follow to keep everyone safe:
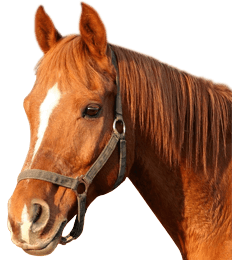
Do not tie or crosstie. If you hit a sore spot he may pull back. Run the rope through a ring and hold on to the other end or use hardware that allows the rope to come loose slowly.
Choose a quiet area to work. If he is comfortable in a stall this is the easiest place for a massage. If he is usually in a pen with other horses, work on him outside the fenced area to keep some distance from his curious friends.
Pay attention. If you hit a particularly sensitive area, he may get defensive.
Never massage with elevated vital signs. Something is going on with your horse and massage may not be appropriate for him at this time.
Stay away from injured areas. Avoid any recent soft tissue injuries.
MOVE #1: THE GLIDE
The horse does most of the work for this move which is why it is a favorite in the head and neck region. All you have to do is place the palm of your hand at the lower region of the area which needs work and apply pressure. If you wait a few seconds, your horse will lean into you for more pressure. When he is ready he will actually lower his head and neck and your hand will slowly move up.
AREAS FOR THE GLIDE AND TECHNIQUE:
Area 1: The base of the neck: This is the blue triangle in figure 1A. Many riders and owners are not aware that the neck bones do not follow along side the entire mane (see 1B). When a horse is actually carrying himself properly it also involves lifting and straightening the base or the root of the neck where it blends in with the shoulder.
When you might use this stroke in this area:
- If your horse bulges his neck and holds his head high with his nose leading, he is overstretching this muscle. This is an "upside-down" horse.
- If this muscle is restricted (shortened), he may take a shorter step with the affected limb.
- When tight and sore on one side, he may hold his head and neck towards that side making it difficult for him to bend laterally to the opposite direction.
Step by step:
- Stand by the side of his neck facing the hind end.
- Position 1: Using your outside hand, point your fingers up and place your palm at the base of the neck and shoulder as shown in figure 1C. Stay above the large strap neck muscle (brachiocephalicus).
- Try to keep as much bend out of your wrist as possible by keeping your elbow pointing towards the ground. Put a slight bend in your knuckles to take the tension out of your hand
- Breathe!
- Lean into the horse just enough so he meets the pressure without stepping away.
- Allow your palm to very slowly slide up. This may take over a minute to reach the top. Allow him to lower his head and neck if he wishes.
- Place your hand above the large strap muscle in position 2 and repeat the move sliding up to the same spot where you ended on the first line.
- Repeat with your hand in position 3.
- Repeat the glide along all three lines again.
Area 2: The poll: This is the region at the top of the neck just behind the base of the ears. In figure 2A the wing of the first neck bone (atlas) is in white. It is highlighted in yellow on the skeleton in figure 2B.
When you might use this stroke in this area:
- If your horse holds his head high with his nose leading, he is tightening the muscles here constantly.
- If he is resisting or fighting the bit. If he is difficult to flex (bend) at the poll.
- If he tilts or rotates his head to one side. (Remember to have someone check his teeth especially those back molars.)
- If this muscle is sensitive and shortened on one side he may resist to bending to the opposite side.
Step by step:
- First make sure he is okay with your hand up here, some horses are a bit concerned at first. Stand on the side of his face and rest your hand just behind the wing of the atlas (first neck bone, Figure 2C). You may need to start a little lower on the neck first if he is uncertain or shy.
- Hold on to the cheek piece of the head collar. Try not to pull down on it. Keep your fingers out of the hardware, they can get caught!
- Position 1(Figure 2D): Place the palm of your outside hand just behind the wing as shown in figures 2A and 2B. Point your fingers towards the hind end and press with the palm.
- Again, try to keep as much bend out of your wrist as possible.
- Apply pressure with your palm and wait for a soft eye.
- When he relaxes by leaning into you and lowering his head, slowly side the palm back keeping the pressure (Figure 2E). Your hand will move fairly horizontal to the ground. Continue the glide for 2 hands lengths which is about as long as the arrows in the pictures. The glide should take at least a minute.
- Repeat 3 times.
Next Part: Forearm Presses and the Melt.
By Debranne Pattillo, MEBW, CEO Equinology INC.
Copyright ©1995 Debranne Pattillo and Equinology, INC, All rights reserved.
All Equinology, INC illustrations, article, text and photos are protected by copyright laws.
{sidebar id=3}
About the Author: Debranne Pattillo is the CEO of Equinology INC, an educational company with sister affiliates around the globe offering over 50 courses taught by leading veterinarians and specialists. Debranne is the chief instructor for the Equine Foundation Massage Certification Massage, Equine Massage Advanced Techniques Level One, the Progressive Equine Anatomy and Equine Stretching courses. She has been featured in various major media publications in the USA, UK, New Zealand and Australia and her work was showcased on BBC's Country Files.
More information can be found at Equinology.
Debranne lives in Gualala, CA and holds a long time practice as a Master Equine Body Worker in the neighboring 5 counties. She spends over 300 days a year on the road tending to horses and teaching.